
If you have a soft spot for gooey, chocolatey treats that bring back the magic of summer campfires, then you’re going to adore Graham’s S’mores Cookie Bars Recipe. This recipe perfectly captures all the nostalgia of classic s’mores with a creative, indulgent twist that transforms those familiar flavors into a chewy, fudge-like cookie bar layered with graham cracker crust, melty marshmallows, and silky Hershey’s chocolate. It’s simple enough to make any day special and sure to become your go-to dessert for cozy gatherings or sweet cravings.
Ingredients You’ll Need
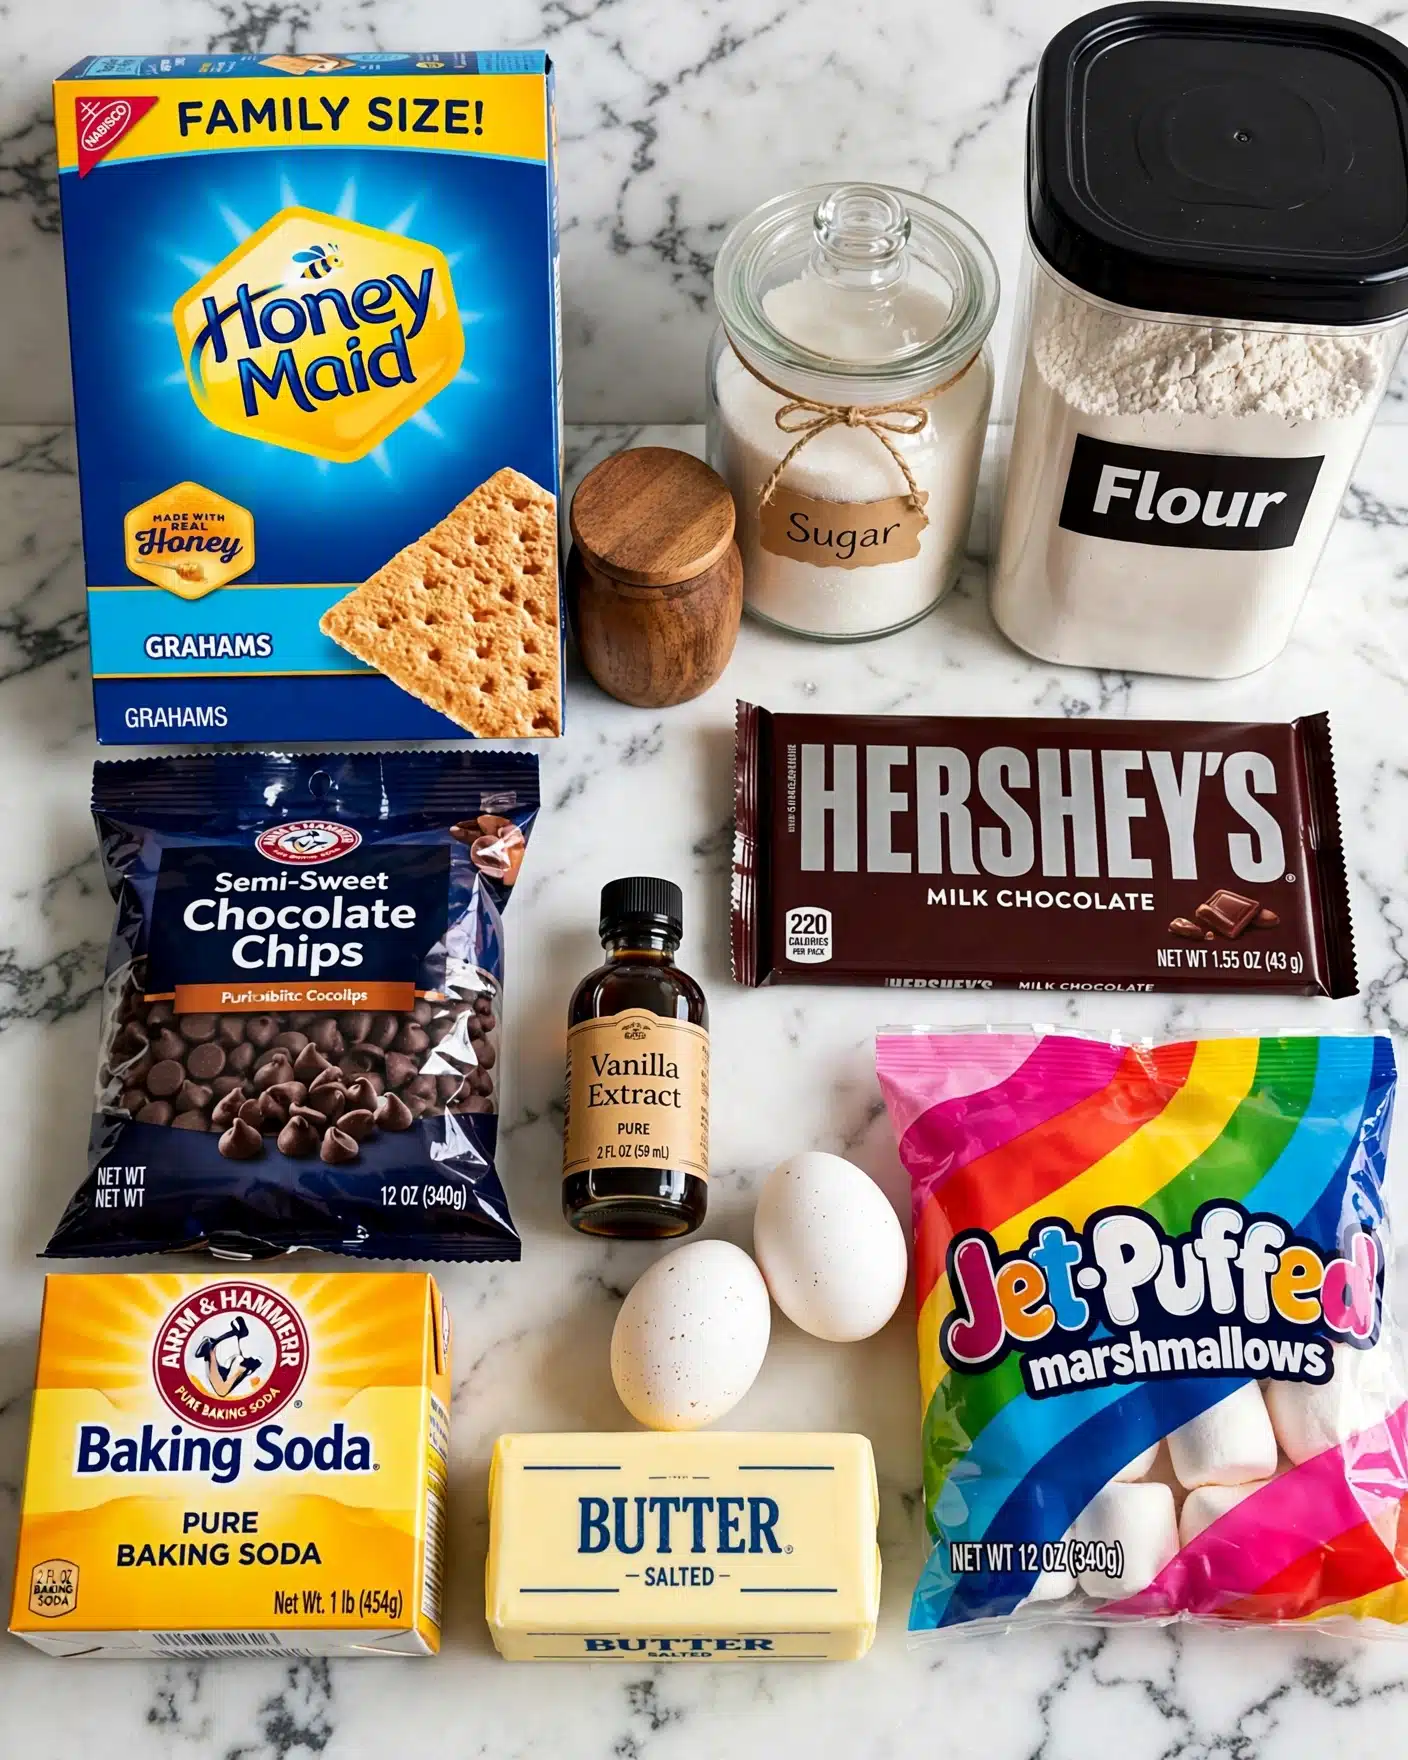
The beauty of Graham’s S’mores Cookie Bars Recipe lies in its handful of straightforward, pantry-friendly ingredients that come together to create a symphony of texture and flavor. Each ingredient plays a crucial role — from the buttery richness and perfect sweetness of the sugars to the crispy, nostalgic graham cracker base that anchors this treat.
- Butter (1 cup melted): Provides a rich, tender base for the cookie dough and helps create that perfect chewy texture.
- Brown sugar (1 cup packed): Adds moisture and deep caramel notes essential for that classic cookie flavor.
- Granulated sugar (2/3 cup): Balances the sweetness and contributes to a slight crispness on the edges.
- Baking soda (1 teaspoon): Helps the dough rise slightly while keeping the bars soft and cakey.
- Hot water (2 teaspoons): Activates the baking soda, ensuring even leavening.
- Eggs (2 large): Bind the ingredients together and create structure.
- Vanilla extract (2 teaspoons): Adds warmth and enhances all the sweet flavors.
- All-purpose flour (2 and 1/3 cups): The foundation of the cookie dough that holds everything together perfectly.
- Cornstarch (1 tablespoon): Makes the bars extra soft and tender without being cakey.
- Kosher salt (1 teaspoon): Balances the sweetness and enhances all the other flavors.
- Semi-sweet chocolate chips (1 cup): Adds pockets of melted chocolate joy throughout the bars.
- Graham crackers (10 full sheets): The classic s’mores crust that adds crunch and nostalgic flavor.
- Hershey’s chocolate bars (5 bars, 1.55 oz each): For that authentic s’mores chocolate layer, adding melty decadence.
- Regular marshmallows (about half a 12-ounce package plus 6 for topping): The gooey, fluffy magic ingredient that ties it all together.
- Optional (ice cream or cold milk): Perfect for serving alongside to elevate your dessert experience.
How to Make Graham’s S’mores Cookie Bars Recipe
Step 1: Prepare Your Oven and Pan
Start by preheating your oven to 325 degrees Fahrenheit so it’s perfectly hot once your bars are ready to bake. Line a 9×13 inch metal pan with parchment paper, making sure to tuck it neatly into the corners, or generously grease the pan for easy removal later. This prep sets the stage for flawless bars you won’t have trouble lifting out.
Step 2: Activate the Leavening
In a small bowl, dissolve 1 teaspoon of baking soda in 2 teaspoons of hot water. This little step is crucial because it ensures the baking soda spreads evenly through the dough and gives a gentle lift without compromising the chewiness of your bars.
Step 3: Mix the Wet Ingredients
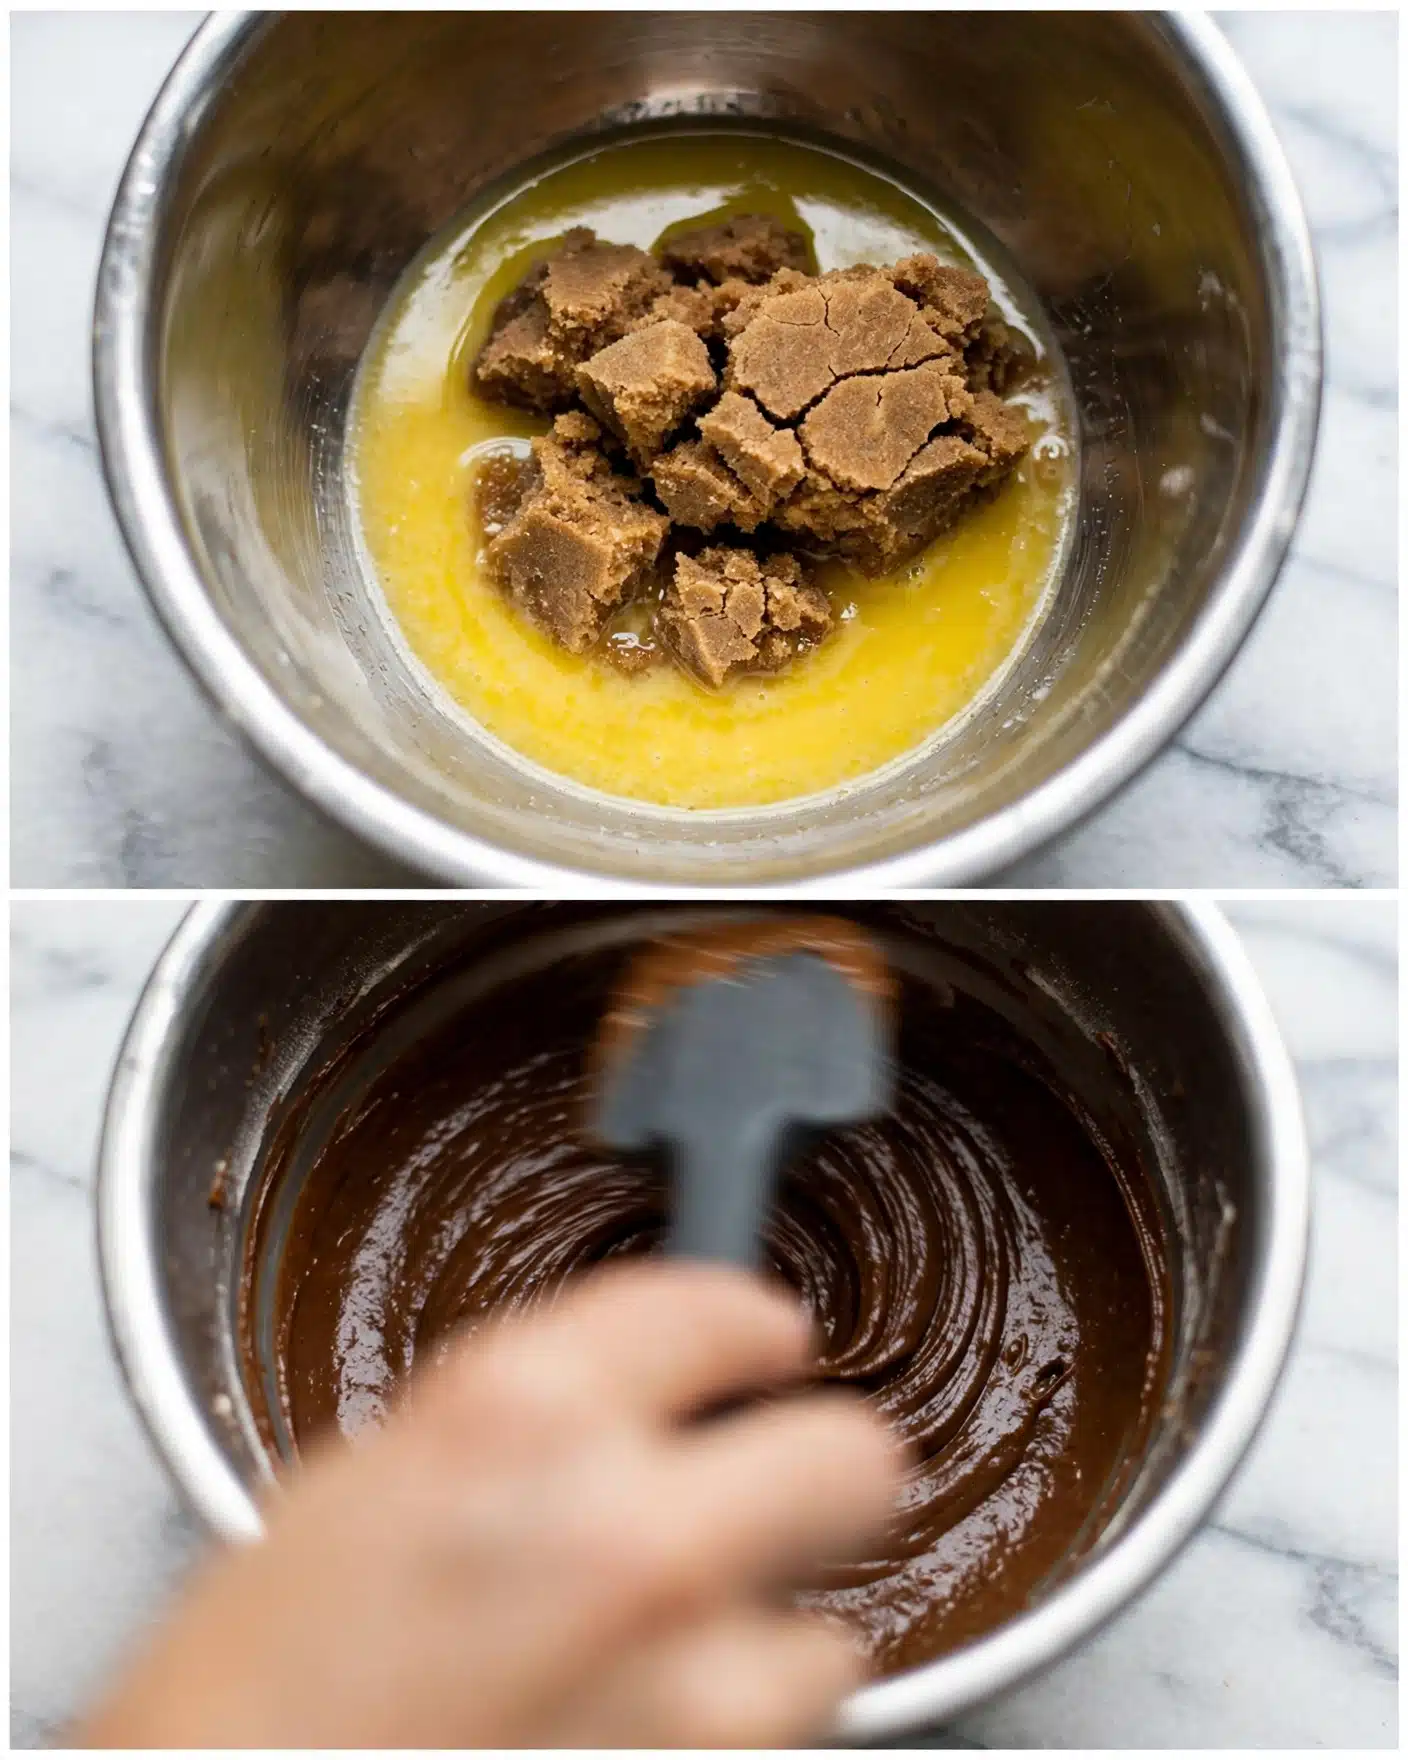
Melt your butter completely and transfer it to a stand mixer or large mixing bowl. Add both brown and granulated sugars and beat together until the mixture is smooth and glossy, about one minute. Then, add the eggs one at a time, beating well after each, followed by the vanilla extract. Finally, stir in the baking soda mixture to combine everything harmoniously.
Step 4: Add the Dry Ingredients
Spoon and level your flour carefully—this little trick keeps the texture just right. Add the flour to the mixer bowl along with the cornstarch and salt, mixing on low speed just until the dry ingredients are incorporated but the dough still shows a few streaks of flour. Overmixing will lead to tough bars, so be gentle here. Let your dough cool for 5 to 10 minutes if it still feels warm before adding chocolate chips, to keep those delicious pockets of chocolate intact.
Step 5: Add Chocolate Chips and Build Your Crust
Fold in the semi-sweet chocolate chips gently. Break up the graham crackers and press them evenly into the bottom of your prepared pan, forming the iconic s’mores crust. This crunchy layer provides that perfect contrast to the chewy cookie dough.
Step 6: Layer the Marshmallows and Chocolate
Spread half of the cookie dough over the graham cracker crust carefully, pressing it into all corners. Next, scatter about 40 marshmallows over the dough layer, pressing them lightly so they settle in. Smash 1 to 2 Hershey’s chocolate bars into chunks and distribute them evenly on top. Then, dollop the remaining cookie dough over the marshmallows and chocolate, spreading it around so some marshmallows peek through—that gooey visual is part of the charm. Finally, top with another 1 to 2 bars of broken Hershey’s chocolate.
Step 7: Bake and Finish
Bake the bars in the preheated oven for 27 to 30 minutes until the tops are beautifully golden and the marshmallows have puffed up and started to brown. Once out, immediately place the last 6 marshmallows, halved, on top, and sprinkle the remaining chocolate squares over them. This final step lets the marshmallows gently melt while the pan is still hot, creating an irresistible soft topping.
How to Serve Graham’s S’mores Cookie Bars Recipe
Garnishes
Adding a scoop of vanilla ice cream on top of warm s’mores bars takes this dessert to a whole new level. The cold creaminess paired with the hot, gooey bars creates a perfect temperature contrast. If ice cream isn’t handy, a drizzle of chocolate sauce or a light dusting of powdered sugar works beautifully too.
Side Dishes
Serve your Graham’s S’mores Cookie Bars Recipe alongside a tall glass of cold milk for a classic combo that never fails to delight. For a cozy gathering, consider pairing with a cup of coffee or hot cocoa, which complements the chocolate and marshmallow flavors perfectly.
Creative Ways to Present
Want to impress your friends? Cut the bars into small bite-sized pieces and skewer them with colorful cocktail sticks for s’mores bites. Or arrange them on a dessert platter garnished with fresh berries and mint leaves for an inviting look. Wrapping individual bars in parchment paper tied with twine makes for cute party favors too.
Make Ahead and Storage
Storing Leftovers
Graham’s S’mores Cookie Bars Recipe keeps best when stored in the pan covered tightly with plastic wrap at room temperature. They’ll stay moist and chewy for up to 4 or 5 days, making them an easy treat to enjoy anytime without losing their signature gooey goodness.
Freezing
If you want to save some for later, freeze the bars wrapped snugly in several layers of plastic wrap and foil to prevent freezer burn. Alternatively, freeze cut bars on a baking sheet first, then transfer them to a ziplock bag. Thaw them on the counter until soft before serving for nearly fresh-baked taste.
Reheating
To revive leftovers, pop a piece in the microwave for about 15 seconds or warm in a low oven briefly. This softens the marshmallows and chocolate again, making them as irresistible as freshly baked bars. Just be careful not to overheat them or the marshmallows might harden.
FAQs
Can I use other types of chocolate instead of Hershey’s bars?
Absolutely! While Hershey’s chocolate bars deliver that classic s’mores flavor, feel free to experiment with milk chocolate, dark chocolate, or even chocolate chunks to suit your taste or what you have on hand.
Do I have to use melted butter for the dough?
Using melted butter helps achieve the chewy texture these cookie bars are famous for, so it’s best not to substitute with softened butter. The melted state changes how the flour hydrates, resulting in that soft, fudgy bite.
Can I make smaller servings instead of bars?
Yes! You can press the dough and toppings into mini muffin tins to create mini s’mores bites, which bake faster and make perfect individual treats, but watch the baking time carefully as they’ll cook quicker than larger bars.
What if I don’t have cornstarch?
Cornstarch keeps the bars tender, but if you don’t have it, you can substitute with an equal amount of potato starch or just omit it—the texture might be a tiny bit less soft but still delicious.
Why do the bars need to cool completely before slicing?
Cooling lets the bars set up and hold their shape when cut, especially because of the gooey marshmallow and melted chocolate layers. Cutting them too hot can cause the filling to ooze and the bars to fall apart.
Final Thoughts
I cannot recommend Graham’s S’mores Cookie Bars Recipe enough! It’s a beautiful blend of nostalgia and foolproof baking that brings endless smiles every time. Whether you’re serving them for a party or cozying up for a treat, these bars never disappoint. Grab your pan and ingredients, and dive into a batch—you’ll be making these forever.
Print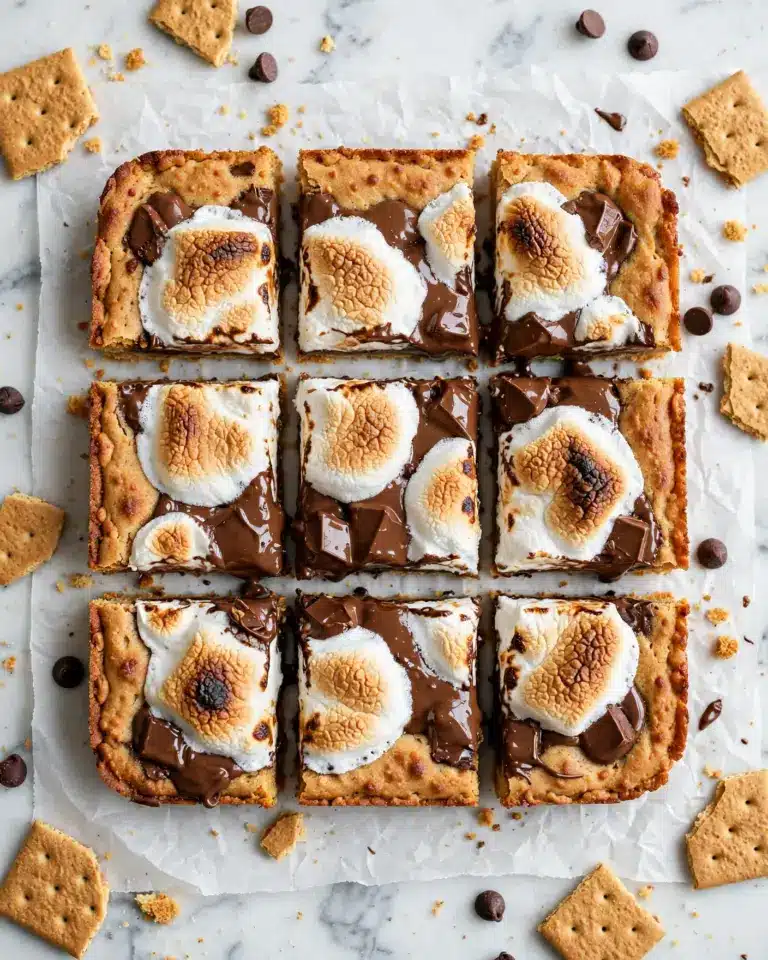
Graham’s S’mores Cookie Bars Recipe
These Graham’s S’mores Cookie Bars combine the classic flavors of s’mores with a soft, chewy cookie bar base. Featuring a crispy graham cracker crust, layers of marshmallows and Hershey’s chocolate bars, and a rich buttery dough studded with chocolate chips, these bars are baked to golden perfection with gooey melted marshmallows and crisp edges. Perfect for parties, camping-inspired treats, or anytime you crave a nostalgic and indulgent dessert.
- Total Time: 50 minutes
- Yield: 20 servings
Ingredients
Cookie Dough
- 1 cup butter (2 sticks, melted)
- 1 cup brown sugar (packed)
- 2/3 cup granulated sugar
- 1 teaspoon baking soda (dissolved in separate bowl)
- 2 teaspoons hot water (dissolved in separate bowl)
- 2 large eggs
- 2 teaspoons vanilla extract
- 2 and 1/3 cups all purpose flour (spooned and leveled)
- 1 tablespoon corn starch
- 1 teaspoon kosher salt (or 3/4 teaspoon table salt)
- 1 cup semi sweet chocolate chips
Assembly
- 10 graham crackers (full sheets)
- 5 bars Hershey’s chocolate bars (1.55 oz each, broken into squares)
- 40 regular marshmallows (about half a 12-ounce package)
- 6 regular marshmallows (to top the bars, halved)
Serving Optional
- Vanilla ice cream or cold milk (for serving)
Instructions
- Preheat and Prepare Pan: Preheat your oven to 325 degrees F. Line a 9×13 inch metal pan with parchment paper, tucking it into the corners and folding edges, or alternatively grease the pan with butter or nonstick spray.
- Dissolve Baking Soda: In a small bowl, combine 1 teaspoon baking soda with 2 teaspoons hot water. Stir until dissolved and set aside.
- Melt Butter and Combine Sugars: Melt 1 cup of butter and transfer to a stand mixer bowl or large mixing bowl. Add 1 cup packed brown sugar and 2/3 cup granulated sugar. Beat well for about 1 minute until combined, scraping down sides as needed.
- Add Eggs and Vanilla: Add one egg and beat well, scraping sides. Then add the second egg and 2 teaspoons vanilla, mixing well.
- Incorporate Baking Soda Mixture: Add the dissolved baking soda mixture to the wet ingredients. Beat thoroughly, scraping sides and bottom, and continue beating for at least 1 minute to combine fully.
- Prepare Dry Ingredients: In a separate bowl, spoon and level 2 and 1/3 cups all-purpose flour. Add 1 tablespoon cornstarch and 1 teaspoon kosher salt (or 3/4 teaspoon table salt), mixing lightly to remove lumps.
- Add Dry to Wet Ingredients: Turn the mixer to low speed and add the flour mixture to the wet ingredients. Beat until you still see a few white streaks of flour; do not overmix. Scrape the sides and fold the mixture a few times with a spatula to ensure even incorporation.
- Cool Dough if Needed: If the dough feels warm from the melted butter, let it cool for 5-10 minutes or refrigerate briefly to prevent melting the chocolate chips later.
- Add Chocolate Chips: Stir in 1 cup semi-sweet chocolate chips just until barely combined. Avoid overmixing to keep the bars tender.
- Make Graham Cracker Crust: Place 10 graham cracker sheets in a single layer covering the bottom of the prepared pan. Break pieces as needed to cover as much of the pan as possible; this forms the crust.
- Spread Half the Dough: Scrape roughly half of the cookie dough over the graham crackers. Distribute the dough in pieces across the pan and use a rubber spatula to press and spread it evenly, including corners.
- Add Marshmallows Layer: Evenly distribute about 40 marshmallows over the dough layer. Press them gently into the dough with your hands.
- Add First Chocolate Layer: Break 1-2 Hershey’s chocolate bars into squares and scatter them evenly on top of the marshmallows, pressing lightly into the dough.
- Top with Remaining Dough: Using a cookie scoop or spoon, drop the remaining cookie dough over the marshmallow and chocolate layers. Use a rubber spatula to spread the dough to cover as much as possible, leaving some marshmallows peeking through.
- Second Chocolate Layer: Sprinkle 1-2 additional Hershey’s chocolate bars broken into squares over the top dough layer.
- Bake Bars: Bake in the preheated oven at 325°F for 27-30 minutes. The bars should be golden on top, with melted marshmallows risen and slightly browned. The edges should be golden and pulling away from the pan, while the center may jiggle slightly but not appear liquid.
- Add Marshmallows to Top: Immediately after removing from oven, cut 6 marshmallows in half and arrange them on top of the bars, cut side down, to melt with the residual heat.
- Final Chocolate Sprinkle: Sprinkle the remaining 1-2 Hershey’s chocolate bars broken into squares over the marshmallow-topped bars.
- Cool Bars: Allow the bars to cool completely to firm up before slicing. Lift the bars from the pan using parchment paper and cut into squares with a sharp knife, wiping the blade clean between cuts.
- Serve Warm or Room Temperature: If eating immediately, allow the bars to set for about 10 minutes after baking. Use a sharp knife to cut and an offset spatula to lift bars. They will be soft and gooey. Top with vanilla ice cream or serve with cold milk if desired.
- Storage: Store leftovers in the pan covered tightly with plastic wrap. Bars stay fresh at room temperature for 4-5 days but may dry out over time.
- Freezing: For freezing, wrap the cooled bars in several layers of plastic wrap and then foil, or cut bars and flash freeze on a lined baking sheet for 30 minutes before transferring to a freezer bag. Thaw at room temperature before serving.
Notes
- For best texture, do not overmix the dough after adding flour and chocolate chips.
- If the dough is warm, refrigerate briefly before adding chocolate chips to prevent melting.
- Use a rubber spatula to help spread sticky dough evenly over the graham cracker crust and marshmallow layers.
- Bars will be soft and gooey when freshly baked; allow to cool fully for easier slicing and cleaner bars.
- Store bars tightly covered to maintain moisture and freshness.
- Freezing helps preserve bars for longer storage and convenience.
- Serving with vanilla ice cream or cold milk adds a delicious complementary flavor.
- Prep Time: 20 minutes
- Cook Time: 30 minutes
- Category: Dessert
- Method: Baking
- Cuisine: American


