
If you’re craving a dish that delivers a mouthwatering crunch combined with rich, cheesy goodness, then you’re in for a treat with this Crispy Chicken Wraps (Cheesy & Pan-Fried) Recipe. Each bite boasts tender, flavorful chicken wrapped snugly inside a crispy, golden exterior that’s bursting with melty cheese, spices, and creamy sauce. Perfect for a comforting lunch, dinner, or even a snack to impress your friends, these wraps blend texture and taste in a way that feels both indulgent and satisfying. I’m excited to walk you through every step so you can bring this delightful dish straight into your kitchen.
Ingredients You’ll Need
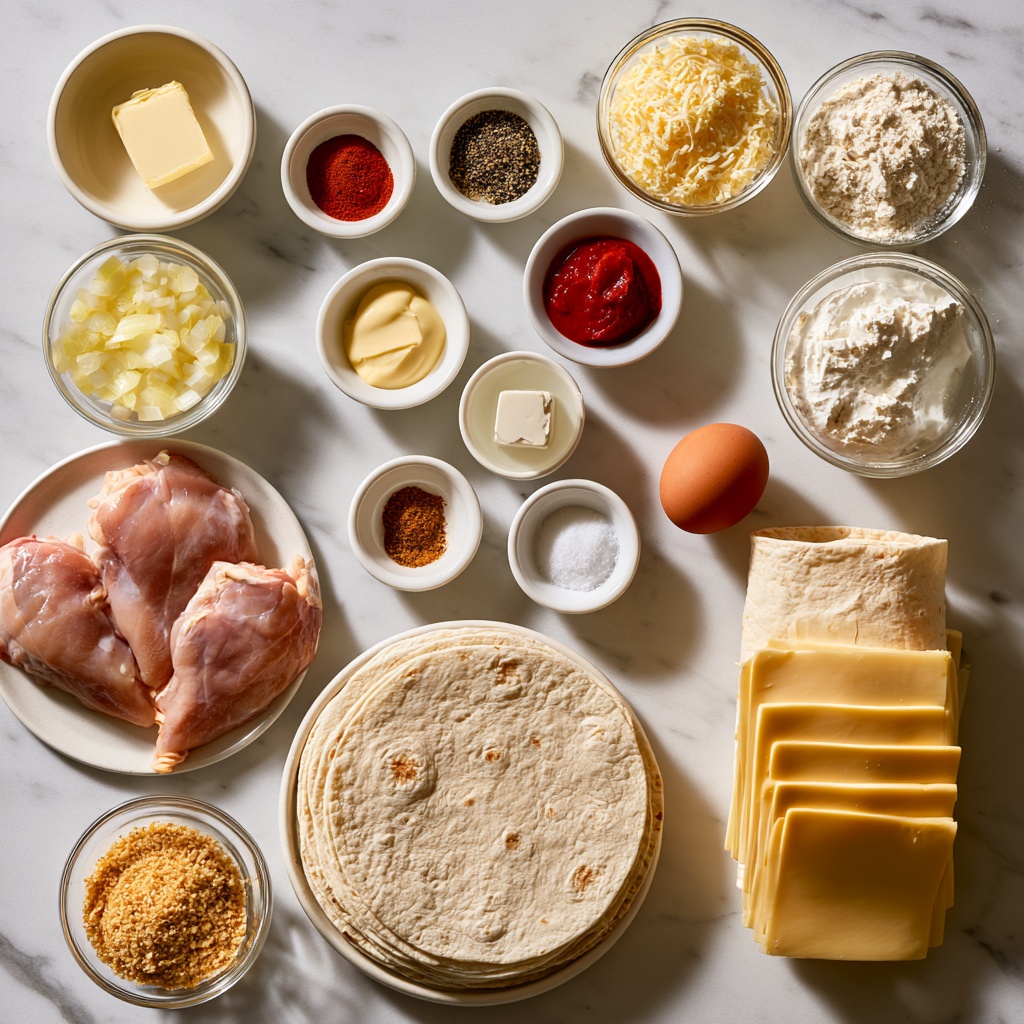
Gathering simple, pantry-friendly ingredients is all it takes to create these irresistible Crispy Chicken Wraps. Each component plays an essential role— from the tender chicken thighs infused with spices to the melty shredded cheese that makes each bite so delicious, to the crispy coating that locks everything in. Let’s check out the delicious essentials!
- Unsalted butter (2 tbsps): Provides a rich base to soften the onions and add depth to the chicken filling.
- Yellow onion (1 medium): Adds sweetness and a delicate texture when sautéed until soft.
- Chicken thighs (1 1/3 lb): Juicy and flavorful, ideal for tender filling.
- Paprika (1 tsp): Offers a gentle smoky warmth that enhances the chicken beautifully.
- Garlic powder (1 tsp): Boosts savory depth without overpowering.
- Cayenne pepper (2/3 tsp + 2/3 tsp): Brings a subtle kick to both the filling and the batter.
- Black pepper (1/2 tsp): Balances flavors with a mild hint of spice.
- Chicken bouillon cube (1): Adds an intense, savory punch that rounds out the sauce.
- Tomato paste (1 1/2 tbsp): Gives richness and a touch of acidity to the creamy sauce.
- Heavy cream (1/2 cup): Creates a luscious, thick texture in the sauce, perfect for keeping the filling moist.
- Shredded cheese (3/4 cup): Melts into the filling, adding gooey, cheesy goodness.
- All-purpose flour (2/3 cup): Forms the base of the batter that seals the wraps.
- Water (3/4 cup): Combines with flour and spices to create the crispy coating’s batter.
- Salt (1/3 tsp): Enhances every flavor in the mix.
- Large egg (1): Binds the batter ingredients for a perfect crisp finish.
- Tortillas (5 large): The canvas for wrapping all those incredible flavors inside.
- Cheese slices (5): Added inside each tortilla for that extra cheesy layer.
- Breadcrumbs (1 1/2 cups): Coat the wraps to get them beautifully browned and crunchy.
- Oil for frying: Necessary to achieve that golden, crispy crust.
How to Make Crispy Chicken Wraps (Cheesy & Pan-Fried) Recipe

Step 1: Cook the Onion and Chicken
Start by melting the butter in a skillet over medium-high heat until shimmering. Then, toss in the chopped yellow onion and let it soften for about 4 minutes, releasing sweet aromas that foreshadow the delicious filling ahead. Next, add the chicken thighs along with the paprika, garlic powder, cayenne, black pepper, and crumble in the chicken bouillon cube. Cook for roughly 6 minutes, stirring often until the chicken is perfectly cooked through and no longer pink—this foundation is going to be bursting with flavor.
Step 2: Create the Creamy Filling
Stir in the rich tomato paste and pour the heavy cream over the chicken mixture. Let it simmer gently for about 5 minutes so the sauce thickens and coats the chicken beautifully. Once it’s thickened, remove the pan from heat and stir in the shredded cheese until it melts completely into the warm mixture. This cheesy, creamy filling is what makes your Crispy Chicken Wraps (Cheesy & Pan-Fried) Recipe shine in every bite. Allow it to cool for about 15 minutes since warm filling can make tortillas soggy and tricky to fold.
Step 3: Prepare the Batter and Assemble the Wraps
While the filling cools, whisk together the flour, water, salt, egg, and the remaining cayenne pepper until smooth, creating the batter that will hold your wraps together and give them that signature crispness. Lay out a tortilla on a flat surface, place a cheese slice in the center, and spoon roughly ¾ cup of the chicken filling atop. Fold the bottom and top edges toward the center, brush the edges lightly with your batter, then fold in the sides tightly to seal the wrap into a neat parcel.
Step 4: Coat and Fry to Crispy Perfection
Pour the breadcrumbs into a shallow bowl. Dip each folded wrap into the batter, ensuring it’s fully coated, then roll it in the breadcrumbs for an extra crunchy shell. Repeat for all tortillas and filling. Heat a thin layer of oil in a large skillet over medium heat. Carefully place the wraps seam side down first, frying until that side is golden and crisp, about 2 to 3 minutes, then flip and cook the other side. Once both sides are beautifully browned, transfer your wraps onto paper towels to drain off excess oil before serving hot and crisp.
How to Serve Crispy Chicken Wraps (Cheesy & Pan-Fried) Recipe
Garnishes
Adding fresh garnishes can truly elevate these wraps. A sprinkle of chopped cilantro or green onions brings a burst of color and fresh flavor that complements the richness inside. A dollop of sour cream or a drizzle of tangy salsa on the side makes every bite lively and balances the creamy filling beautifully.
Side Dishes
For a satisfying meal, serve these wraps alongside crisp garden salads or vibrant coleslaw for crunch and freshness. If you’re in the mood to indulge further, oven-baked sweet potato fries or a zesty corn salad add warmth and complementary textures to round out the plate perfectly.
Creative Ways to Present
Looking to impress at your next gathering? Cut each wrap in half diagonally and arrange them on a platter with little bowls of dipping sauces like chipotle mayo, ranch, or a homemade garlic aioli. Stacking wraps upright in a basket lined with parchment paper not only looks inviting but makes grabbing and enjoying them a breeze.
Make Ahead and Storage
Storing Leftovers
If you have leftovers, store the wraps wrapped tightly in plastic wrap or placed in an airtight container in the refrigerator. They’ll keep well for up to 3 days, making them perfect for busy days when you want a quick, delicious meal without cooking from scratch.
Freezing
These Crispy Chicken Wraps (Cheesy & Pan-Fried) Recipe wraps freeze surprisingly well. Wrap each parcel individually in foil or plastic wrap, then store them in a freezer bag for up to a month. Freezing before frying is best to maintain crispiness when you cook them fresh later.
Reheating
To reheat, bake the wraps in an oven preheated to 375°F (190°C) for 10 to 15 minutes until heated through and crispy again. Avoid microwaving if you want to keep the exterior crunchy, since that can make the wraps soggy.
FAQs
Can I use chicken breast instead of thighs?
Yes! Chicken breast works well if you prefer leaner meat, but keep in mind that thighs lend juiciness and flavor that really complement the creamy, spicy filling in this recipe.
What cheese is best for melting inside these wraps?
Shredded cheddar or mozzarella are fantastic choices for melty, gooey cheese. You can also mix cheeses for added depth, just use something that melts well and has good flavor.
Is it possible to bake the wraps instead of frying?
Absolutely! For a lighter version, bake the coated wraps at 400°F (200°C) for about 20 minutes, flipping halfway through, until golden and crisp.
How spicy are these wraps?
The cayenne pepper adds a gentle warmth—not overwhelming but enough to give the filling a subtle spicy kick that you can adjust to your liking.
Can I prepare the filling in advance?
Definitely! Making the filling a day ahead allows the flavors to meld beautifully. Just keep it refrigerated and cool it thoroughly before assembling your wraps to prevent sogginess.
Final Thoughts
There’s something incredibly rewarding about biting into a homemade wrap that’s crispy on the outside and bursting with cheesy, flavorful chicken inside. This Crispy Chicken Wraps (Cheesy & Pan-Fried) Recipe is a go-to that’s sure to satisfy any craving and impress your loved ones. Give it a try—you might just end up making these wraps a new family favorite!
Print
Crispy Chicken Wraps (Cheesy & Pan-Fried) Recipe
These Crispy Chicken Wraps are a deliciously cheesy and pan-fried meal perfect for a satisfying lunch or dinner. Tender chicken thighs are cooked with a flavorful blend of spices, tomato paste, and cream, then wrapped with cheese in tortillas. The wraps are coated in a crispy breadcrumb crust and pan-fried until golden brown, offering a delightful combination of creamy filling and crunchy exterior.
- Total Time: 50 minutes
- Yield: 5 servings
Ingredients
For the Chicken Filling
- 2 tbsps unsalted butter
- 1 medium yellow onion, chopped
- 1 1/3 lb chicken thighs, cut into pieces
- 1 tsp paprika
- 1 tsp garlic powder
- 2/3 tsp cayenne pepper
- 1/2 tsp black pepper
- 1 chicken bouillon cube, crumbled
- 1 1/2 tbsp tomato paste
- 1/2 cup heavy cream
- 3/4 cup shredded cheese
For the Batter and Coating
- 2/3 cup all-purpose flour
- 3/4 cup water
- 1/3 tsp salt
- 1 large egg
- 2/3 tsp cayenne pepper
- 1 1/2 cup breadcrumbs
- Oil for frying (enough for shallow frying)
For Assembling
- 5 large tortillas
- 5 cheese slices
Instructions
- Prepare the Onion: Melt the butter in a large skillet over medium-high heat. Add the chopped onion and cook for about 4 minutes until softened and fragrant.
- Cook the Chicken: Add the chicken pieces to the skillet along with paprika, garlic powder, cayenne pepper, and black pepper. Crumble the chicken bouillon cube over the pan. Cook for about 6 minutes, stirring occasionally, until the chicken is no longer pink and fully cooked through.
- Add Tomato Paste and Cream: Stir in the tomato paste thoroughly, then pour in the heavy cream. Mix well and let the mixture simmer for about 5 minutes until the sauce thickens nicely.
- Incorporate Shredded Cheese: Remove the skillet from heat and add the shredded cheese. Stir until the cheese has fully melted into the sauce. Allow the filling to cool for about 15 minutes, as warm filling can cause tortillas to become soggy.
- Mix the Batter: In a separate bowl, whisk together the all-purpose flour, water, salt, egg, and cayenne pepper until you achieve a smooth batter suitable for sealing the wraps.
- Assemble the Wraps: Lay a tortilla flat and place one slice of cheese in the center. Spoon approximately 3/4 cup (185 g) of the chicken filling over the cheese. Fold the bottom and top edges of the tortilla toward the center. Brush the edges with a little of the prepared batter, then fold the sides inward to form a tight, sealed parcel.
- Coat the Wraps: Pour the breadcrumbs into a wide, shallow bowl. Dip each wrapped parcel into the batter to coat evenly, then roll in the breadcrumbs until fully covered.
- Repeat Assembly: Repeat the assembling and coating steps with the remaining tortillas and filling to make all five wraps.
- Fry the Wraps: Heat a thin layer of oil in a large skillet over medium heat. Fry the wraps seam side down first to seal them properly, then carefully flip to fry the other side. Continue frying until both sides are golden brown and crispy, about 2 to 3 minutes per side.
- Drain and Serve: Remove the crispy wraps from the skillet and place them on a paper towel-lined plate to absorb excess oil. Serve immediately while hot and crunchy.
Notes
- Allowing the filling to cool is important to prevent the tortillas from becoming soggy during assembly.
- Adjust cayenne pepper quantity to your preferred spice level.
- Use chicken thighs for juicier and more flavorful filling compared to chicken breast.
- The cheese inside the wrap helps bind the filling and adds extra creaminess.
- Shallow frying is sufficient to get a crispy crust; no need for deep frying.
- Prep Time: 15 minutes
- Cook Time: 30 minutes
- Category: Main Course
- Method: Frying
- Cuisine: American


