Why You’ll Love This Recipe
- Vibrant and festively colored—perfect for celebrations or photo-worthy treats
- Crunch meets cream—crispy rolls with rich, pillowy filling
- Simple to bake—requires just one bowl and a piping bag
- Customizable—add sprinkles or drizzle chocolate for extra flair
ingredients
(Tip: You’ll find the full list of ingredients and measurements in the recipe card below.)
For the wafer rolls:
- milk
- vinegar
- red food color
- butter
- sugar
- flour
- cocoa powder
For the cream cheese frosting:
- cream cheese
- butter
- sugar
- whipped cream (heavy cream whipped to stiff peaks)
directions
- Prep milk mixture: Pour milk into a bowl, stir in vinegar and red food color—set aside for a minute to slightly curdle.
- Make batter: Melt butter and mix with sugar in a medium bowl. Stir in the milk mixture. Add flour and cocoa powder until smooth and thick.
- Pipe rounds: Preheat oven to 350 °F (175 °C). Line baking sheets with parchment. Pipe small 2″ rounds of batter (they’ll spread into wafer discs).
- Bake wafers: Bake for 8–10 minutes until edges are firm and center is just set. Remove from oven.
- Shape rolls: While still warm and pliable, lift each wafer and roll it around a skewer or chopstick to form tubes. Set aside to cool fully—rolls will crisp as they cool.
- Make frosting: Beat cream cheese, butter, and sugar until smooth. Gently fold in whipped cream until fluffy.
- Fill rolls: Transfer frosting to a piping bag with a small round tip. Pipe into cooled wafer rolls until filled.
Servings and timing
- Yield: About 16–18 wafer rolls, depending on size
- Prep time: 10 minutes (plus setup)
- Bake time: 10 minutes per batch (makes about 8–10 at a time)
- Assembly time: 15 minutes (including cooling and filling)
- Total time: Approximately 45–60 minutes
Variations
- Chocolate drizzle: Melt some dark chocolate and drizzle over filled rolls—let it set for added texture.
- Sprinkles: Dip one end in crushed sprinkles or cocoa powder for a festive look.
- Citrus twist: Swap vanilla in the frosting for citrus zest (orange or lemon) to brighten the flavor.
- Vegan option: Replace butter and cream cheese with plant-based versions; whip coconut cream for the fluffy component.
storage/reheating
- Room temperature: Store in an airtight container for up to 2 days—best enjoyed freshly made for crispness.
- Refrigerator: If you prefer firmer filling, refrigerate for up to 4 days. Let sit 15 minutes at room temperature before serving to soften slightly.
- Freezing: Not recommended—wafer texture is best enjoyed fresh.
FAQs
What makes the wafers crisp?
Rolling the wafers while they’re still warm helps set their shape—once cooled, they become crisp and hold their form.
Can I use a ready-made wafer sheet or waffle cone batter?
Technically, yes—but to get the classic red velvet flavor and color, homemade batter ensures the best result.
Why add vinegar to the milk?
The vinegar slightly curdles the milk, which softens the batter and adds moisture without thinning it—reminiscent of buttermilk effects.
My rolls cracked while shaping—what went wrong?
They likely cooled too much. You need to shape them immediately after baking, while still pliable.
How do I get a deep red color?
Using gel-based food coloring gives a richer hue without adding liquid—just a small amount makes a big difference.
Can I fill the rolls ahead of time?
Yes—pipe them up to a few hours ahead. For maximum crispness, fill just before serving.
Can I make them sugar-free?
Yes—use a sugar substitute compatible with baking (e.g. erythritol) and powdered sweetener for the frosting; texture may vary slightly.
How do I store unfilled wafers?
Keep them in an airtight container for 2–3 days. Fill them fresh for best texture retention.
Can I flavor the frosting?
Absolutely—add extracts like vanilla, almond, or citrus; or fold in finely chopped berries for color contrast.
Do I need a piping tip to fill?
No—snip the bag’s tip to about ¼″ diameter for easy filling if you don’t have a piping tip.
Conclusion
Red Velvet Wafer Rolls combine charming presentation with balanced tastes of chocolate and cream cheese. Ideal for gifting, afternoon treats, or festive tables, they’re fun to make and delightful to eat. Try them as-is or explore variations—you’re sure to impress!
Print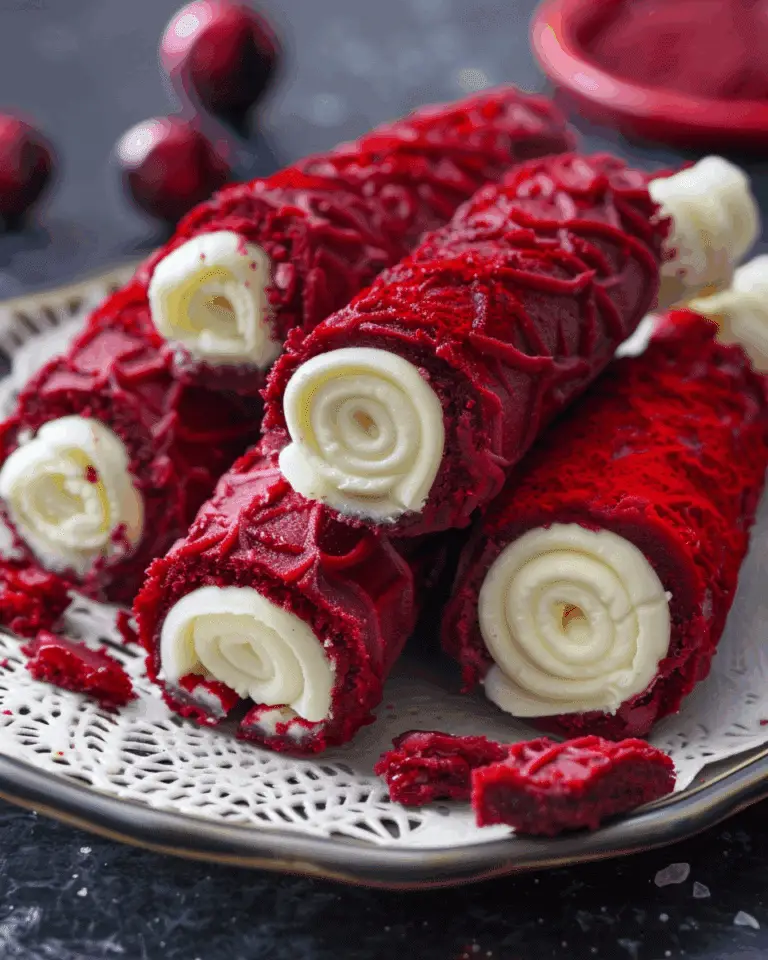
Red Velvet Wafer Rolls
Crispy red velvet-flavored rolls filled with creamy, slightly tangy cream cheese frosting—a beautiful combo of texture, color, and flavor.
- Total Time: 45–60 minutes
- Yield: 16–18 wafer rolls
Ingredients
For the wafer rolls:
1/2 cup milk
1 tsp vinegar
1–2 tsp red gel food color
1/4 cup unsalted butter, melted
1/4 cup granulated sugar
1/2 cup all-purpose flour
1 tbsp cocoa powder
For the cream cheese frosting:
4 oz cream cheese, softened
2 tbsp unsalted butter, softened
1/4 cup powdered sugar
1/3 cup heavy cream, whipped to stiff peaks
Instructions
- Prep milk mixture: In a bowl, stir together milk, vinegar, and red gel food color. Let sit for 1 minute to slightly curdle.
- Make batter: In a medium bowl, mix melted butter and sugar. Stir in the milk mixture. Add flour and cocoa powder; whisk until smooth and thick.
- Pipe rounds: Preheat oven to 350 °F (175 °C). Line baking sheets with parchment. Pipe 2-inch rounds (batter will spread).
- Bake wafers: Bake for 8–10 minutes until edges are firm and centers just set. Remove from oven.
- Shape rolls: While wafers are warm and pliable, roll each around a skewer or chopstick. Cool completely on a rack to crisp.
- Make frosting: Beat cream cheese, butter, and powdered sugar until smooth. Fold in whipped cream until light and fluffy.
- Fill rolls: Pipe frosting into both ends of each cooled wafer roll using a piping bag with a small round tip. Serve immediately or chill slightly before serving.
Notes
Roll wafers quickly after baking to avoid cracking.
Use gel food coloring for vibrant red without excess liquid.
Fill just before serving to maintain crispness.
Add chocolate drizzle or sprinkles for decoration.
Store unfilled rolls in an airtight container up to 3 days.
- Prep Time: 10 minutes
- Cook Time: 10 minutes per batch
- Category: Dessert
- Method: Baking
- Cuisine: American
- Diet: Vegetarian
Nutrition
- Serving Size: 1 roll
- Calories: 120
- Sugar: 8g
- Sodium: 55mg
- Fat: 8g
- Saturated Fat: 5g
- Unsaturated Fat: 2g
- Trans Fat: 0g
- Carbohydrates: 10g
- Fiber: 0g
- Protein: 1g
- Cholesterol: 25mg

