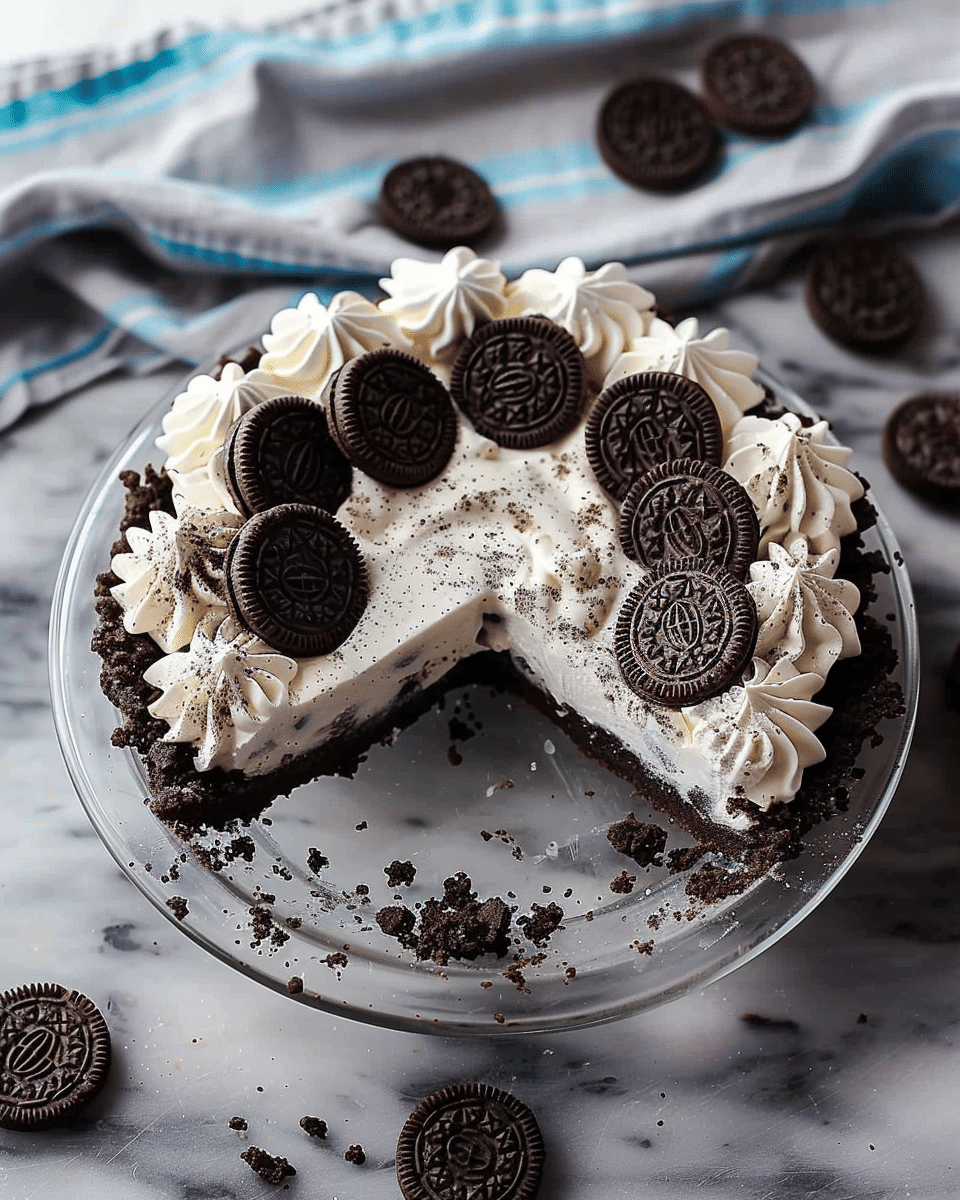
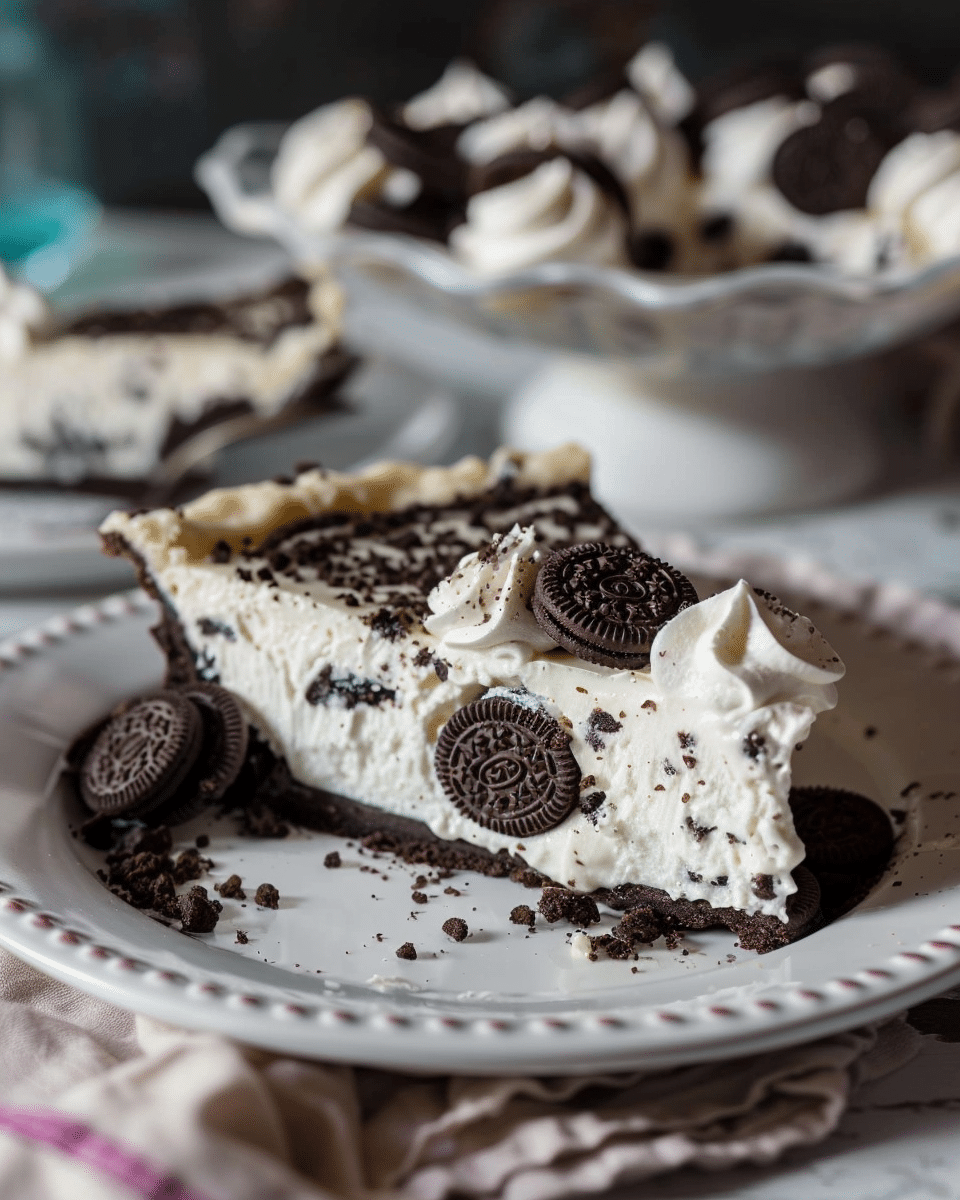
I love how creamy and indulgent this Oreo Pie turns out every single time. It’s rich, chocolatey, and packed with cookies in every bite. The crust is buttery and crunchy, while the filling is smooth and fluffy with the perfect balance of sweetness. This no-bake dessert is one of my go-to recipes whenever I want something that looks impressive but is surprisingly simple to make.
Why You’ll Love This Recipe
I like this recipe because it requires no baking, which makes it quick and convenient. The Oreo crust comes together with just two ingredients, and the filling is light yet decadent. I also love that I can prepare it ahead of time, making it perfect for holidays, birthdays, or casual get-togethers. Each slice feels like a cookies-and-cream dream.
Ingredients
(Note: All ingredient amounts are listed in the recipe card below.)
For Crust
▢25 Oreo cookies
▢4 Tablespoons (55 g) butter melted (salted or unsalted is fine)
For Filling
▢1 ½ cups (354 ml) heavy cream cold
▢1 cup (125 g) powdered sugar divided
▢16 oz cream cheese softened (see note)
▢¼ cup (56 g) sour cream
▢1 teaspoon vanilla extract
▢15 Oreo cookies broken into pieces (see note)
▢Whipped cream for topping optional
Directions
- I start by crushing the Oreo cookies for the crust into fine crumbs, then mix them with melted butter until well combined.
- I press the mixture firmly into the bottom and up the sides of a 9-inch pie dish, then set it aside in the refrigerator to chill.
- In a large mixing bowl, I whip the cold heavy cream with half of the powdered sugar until stiff peaks form, then set it aside.
- In another bowl, I beat the softened cream cheese, the remaining powdered sugar, sour cream, and vanilla extract until smooth and creamy.
- I fold the whipped cream gently into the cream cheese mixture until combined.
- I stir in the broken Oreo pieces.
- I spread the filling evenly into the prepared crust and smooth the top.
- I refrigerate the pie for at least 4–6 hours, or overnight, to allow it to set properly.
- Before serving, I like topping it with whipped cream and extra Oreo pieces for garnish.
Servings and Timing
This Oreo Pie serves about 8–10 slices. It usually takes me around 20 minutes to prepare, plus at least 4–6 hours of chilling time before it’s ready to serve.
Variations
Sometimes I swap the Oreo crust for a graham cracker crust for a lighter twist. I also like adding a drizzle of chocolate ganache over the top for extra richness. If I want more crunch, I sprinkle crushed Oreos on top before chilling. For a fun twist, I sometimes use flavored Oreos like mint or peanut butter.
Storage/Reheating
I keep the pie covered in the refrigerator for up to 4 days. Since it’s a no-bake cream-based dessert, I don’t freeze it because the texture changes when thawed. I don’t reheat this recipe, as it’s best served chilled straight from the fridge.
FAQs
Can I use store-bought Oreo crust instead of making my own?
Yes, I can use a pre-made Oreo crust to save time, but I prefer homemade because it’s thicker and sturdier.
Do I need to remove the filling from the Oreos when making the crust?
No, I keep the filling in, as it helps bind the crust and makes it taste richer.
Can I make this pie ahead of time?
Yes, I like making it the day before since it sets beautifully overnight.
What if I don’t have sour cream?
I can substitute with plain Greek yogurt for a similar tangy flavor.
Can I freeze Oreo Pie?
I don’t recommend freezing because the cream filling changes texture and becomes grainy when thawed.
Can I use Cool Whip instead of whipping cream?
Yes, I can fold in Cool Whip instead of freshly whipped cream for convenience, though I prefer the flavor of homemade whipped cream.
How do I make the crust firmer?
I press the Oreo mixture down firmly into the pan and let it chill in the fridge for at least 30 minutes before adding the filling.
Can I make this with double-stuffed Oreos?
Yes, I can use double-stuffed Oreos, but the crust and filling will be a little sweeter.
How long should I chill the pie before serving?
I recommend at least 4–6 hours, but overnight gives the best results.
Can I add chocolate chips or candy to the filling?
Yes, I sometimes fold in mini chocolate chips, crushed candy bars, or even peanut butter cups for extra texture and flavor.
Conclusion
I love how easy and delicious this Oreo Pie is to make. It’s creamy, rich, and packed with Oreo flavor in every layer. Whenever I bring this to a gathering, it disappears quickly and always gets requests for the recipe. This pie is the perfect no-bake treat for anyone who loves cookies and cream desserts.
Print
Oreo Pie
This no-bake Oreo Pie is a creamy, indulgent dessert with a buttery Oreo crust and a fluffy cookies-and-cream filling. It’s rich, chocolatey, and perfect for parties, holidays, or casual gatherings.
- Total Time: 4 hours 20 minutes (includes chilling time)
- Yield: 8–10 slices
Ingredients
25 Oreo cookies
4 tablespoons (55 g) butter, melted (salted or unsalted)
1 ½ cups (354 ml) heavy cream, cold
1 cup (125 g) powdered sugar, divided
16 oz cream cheese, softened
¼ cup (56 g) sour cream
1 teaspoon vanilla extract
15 Oreo cookies, broken into pieces
Whipped cream, for topping (optional)
Instructions
- Crush 25 Oreo cookies into fine crumbs and mix with melted butter until combined.
- Press mixture into the bottom and sides of a 9-inch pie dish. Refrigerate to chill.
- In a large bowl, whip cold heavy cream with half of the powdered sugar until stiff peaks form. Set aside.
- In another bowl, beat softened cream cheese, remaining powdered sugar, sour cream, and vanilla extract until smooth and creamy.
- Gently fold whipped cream into the cream cheese mixture until well combined.
- Stir in broken Oreo pieces.
- Spread filling evenly into the prepared crust and smooth the top.
- Refrigerate for 4–6 hours, or overnight, until set.
- Before serving, top with whipped cream and extra Oreo pieces if desired.
Notes
A store-bought Oreo crust can be used instead of homemade.
Keep the Oreo filling when making the crust for better texture and flavor.
Chill overnight for best results.
Substitute sour cream with Greek yogurt if needed.
Do not freeze, as the filling becomes grainy when thawed.
- Prep Time: 20 minutes
- Cook Time: 0 minutes
- Category: Dessert
- Method: No Bake
- Cuisine: American
- Diet: Vegetarian
Nutrition
- Serving Size: 1 slice
- Calories: 420
- Sugar: 30 g
- Sodium: 280 mg
- Fat: 28 g
- Saturated Fat: 15 g
- Unsaturated Fat: 11 g
- Trans Fat: 0 g
- Carbohydrates: 38 g
- Fiber: 1 g
- Protein: 6 g
- Cholesterol: 65 mg

