

Why You’ll Love This Recipe
These kimchi cheese rice balls are:
- Bold and flavorful: The spicy, tangy kimchi paired with melty cheese creates an explosion of flavor in every bite.
- Cheesy and crispy: With mozzarella cheese in the center and a crispy golden exterior, these rice balls offer the perfect combination of textures.
- Versatile: Whether you’re serving them as a snack, appetizer, or meal, these rice balls are perfect for any occasion.
- Easy to make: With simple ingredients and a straightforward process, you can have these rice balls ready in no time.
Ingredients
- 1 cup fermented kimchi, finely chopped
- 1 teaspoon sugar (optional, if kimchi is too sour)
- 2 cups cooked white rice (medium or short grain)
- 1½ tablespoons regular soy sauce
- 1 tablespoon toasted sesame seeds (optional)
- 1 teaspoon toasted sesame oil (optional)
- ⅔ cup shredded mozzarella cheese
- Oil as needed for cooking
(Tip: You’ll find the full list of ingredients and measurements in the recipe card below.)
Directions
- Prepare the rice mixture: In a bowl, combine the cooked white rice with the finely chopped kimchi. If the kimchi is too sour, you can add 1 teaspoon of sugar to balance the flavor. Add soy sauce, toasted sesame seeds, and sesame oil (if using), and mix everything together until well combined.
- Form the rice balls: Take a small amount of the rice mixture (about 2 tablespoons) and flatten it into a small patty in your palm. Place a small amount of shredded mozzarella cheese in the center, then carefully fold the rice around the cheese and roll it into a ball. Repeat with the remaining mixture and cheese.
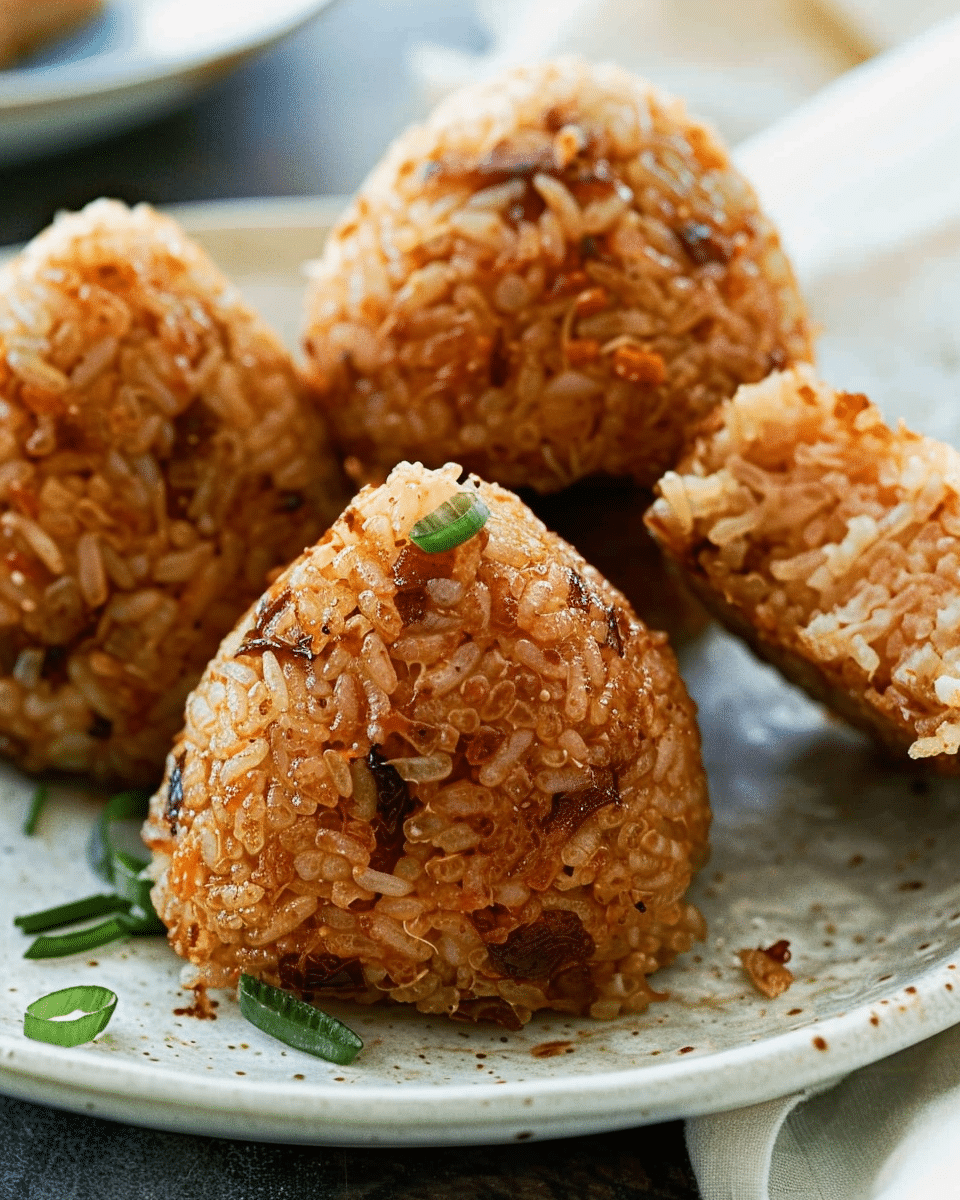
- Cook the rice balls: Heat a small amount of oil in a skillet over medium heat. Once the oil is hot, carefully place the rice balls in the skillet. Cook for 2-3 minutes on each side, or until they are golden brown and crispy. Be gentle while flipping to avoid breaking the rice balls.
- Serve: Once the rice balls are crispy and golden, remove them from the skillet and place them on a paper towel-lined plate to absorb any excess oil. Serve hot with a dipping sauce or enjoy them on their own.
Servings and Timing
- Servings: 8-10 rice balls
- Prep Time: 10 minutes
- Cook Time: 10 minutes
- Total Time: 20 minutes
Variations
- Spicy version: Add a little gochujang (Korean chili paste) to the rice mixture for an extra spicy kick.
- Vegetarian option: Skip the cheese or use a dairy-free cheese substitute to make these rice balls vegan-friendly.
- Add protein: Mix in cooked beef, or tofu for added protein and texture.
Storage/Reheating
- Storage: Leftover rice balls can be stored in an airtight container in the fridge for up to 2 days.
- Reheating: To reheat, place the rice balls in a 350°F (175°C) oven for 10 minutes or until warm and crispy. You can also reheat them in a skillet with a little oil.
FAQs
1. Can I use any type of rice for this recipe?
It’s best to use medium or short-grain rice for this recipe as it holds together better when forming the rice balls. However, you can use long-grain rice if that’s all you have.
2. Can I make these rice balls ahead of time?
Yes, you can prepare the rice balls in advance, refrigerate them, and then cook them just before serving. They can also be frozen and cooked later.
3. Can I make these rice balls without cheese?
Yes, you can skip the cheese if you prefer, or substitute it with a non-dairy cheese for a vegan option.
4. Can I use kimchi from a jar?
Yes, jarred kimchi works well for this recipe. Just be sure to chop it finely, as you want the flavors to be evenly distributed in the rice.
5. What can I serve with kimchi cheese rice balls?
These rice balls are great on their own or served with a dipping sauce such as soy sauce, spicy mayo, or a tangy vinegar-based sauce.
6. How do I avoid the rice balls falling apart when cooking?
Make sure the rice balls are tightly packed and the cheese is well-sealed in the center. Cooking them over medium heat ensures they don’t get too soft before they crisp up.
7. Can I bake these rice balls instead of frying them?
Yes, you can bake the rice balls in a preheated oven at 375°F (190°C) for 15-20 minutes, flipping them halfway through, until they are golden brown and crispy.
8. Can I make these rice balls without sesame oil or seeds?
Yes, you can omit the sesame oil and seeds if you don’t have them or prefer a different flavor. The rice balls will still taste great without them.
9. Can I freeze kimchi cheese rice balls?
Yes, you can freeze the uncooked rice balls. Just make sure they are fully cooled before freezing, and store them in an airtight container. When ready to cook, fry them from frozen, adding a few extra minutes to the cooking time.
10. How do I ensure the cheese melts perfectly inside the rice ball?
Using shredded mozzarella cheese will melt well and create the gooey, cheesy center. Just be sure to seal the rice ball tightly around the cheese to prevent it from leaking out during cooking.
Conclusion
Kimchi cheese rice balls are a fun, flavorful, and easy-to-make snack or appetizer. With the combination of spicy, tangy kimchi and gooey mozzarella, these rice balls provide a perfect balance of flavors and textures. Whether you’re looking to try something new or simply want a delicious bite-sized treat, these rice balls will be a hit with everyone. Enjoy them on their own or with your favorite dipping sauce!
Print
Kimchi Cheese Rice Balls
Kimchi cheese rice balls are a flavorful fusion dish that combines spicy, tangy kimchi with gooey mozzarella cheese, all wrapped in a crispy, golden exterior. Perfect as a snack, appetizer, or side dish.
- Total Time: 20 minutes
- Yield: 8-10 rice balls
Ingredients
1 cup fermented kimchi, finely chopped
1 teaspoon sugar (optional, if kimchi is too sour)
2 cups cooked white rice (medium or short grain)
1½ tablespoons regular soy sauce
1 tablespoon toasted sesame seeds (optional)
1 teaspoon toasted sesame oil (optional)
⅔ cup shredded mozzarella cheese
Oil as needed for cooking
Instructions
- Prepare the rice mixture: In a bowl, combine the cooked white rice with the finely chopped kimchi. If the kimchi is too sour, you can add 1 teaspoon of sugar to balance the flavor. Add soy sauce, toasted sesame seeds, and sesame oil (if using), and mix until well combined.
- Form the rice balls: Take about 2 tablespoons of the rice mixture and flatten it into a small patty in your palm. Place a small amount of shredded mozzarella cheese in the center, then fold the rice around the cheese and roll it into a ball. Repeat with the remaining mixture and cheese.
- Cook the rice balls: Heat oil in a skillet over medium heat. Once hot, add the rice balls and cook for 2-3 minutes on each side until golden brown and crispy. Be gentle while flipping to avoid breaking the rice balls.
- Serve: Once crispy and golden, remove the rice balls from the skillet and place them on a paper towel-lined plate to absorb excess oil. Serve hot with a dipping sauce or enjoy on their own.
Notes
If kimchi is too sour, balance it with sugar or adjust seasoning to your liking.
You can add a spicy kick by incorporating gochujang (Korean chili paste) into the rice mixture.
For a vegan option, skip the cheese or use a dairy-free cheese substitute.
These rice balls can be baked at 375°F (190°C) for 15-20 minutes for a healthier alternative to frying.
- Prep Time: 10 minutes
- Cook Time: 10 minutes
- Category: Snack
- Method: Pan-frying
- Cuisine: Fusion
- Diet: Vegetarian
Nutrition
- Serving Size: 1 rice ball
- Calories: 140
- Sugar: 2g
- Sodium: 370mg
- Fat: 6g
- Saturated Fat: 3g
- Unsaturated Fat: 3g
- Trans Fat: 0g
- Carbohydrates: 17g
- Fiber: 2g
- Protein: 6g
- Cholesterol: 15mg


